A couple months back, we posted about how a TPMS saved our bacon (link to that post). A TPMS is great, but what should your tires be inflated to? This is a question that many new RV’ers have because, in their regular drive around town car, they just inflate to the pressure listed on the door post of your car (you do.. right?).
The right answer for RV’s is a bit more complicated.
Warning: Lots of words ahead!
While inflating to the pressure listed on a sticker in your RV will usually keep you safe, it can often be too much pressure which is certainly sub-optimal.
Risks with overinflation
- Uneven tire wear
- This is usually less of a concern for RV’ers since we tend to exhaust the life of a tire from a chemical and structural soundness perspective LONG before we wear out the tire, but still worth noting. With over-inflation, the tire wears more on the center of the tread instead of wearing across the entire contact surface.
- Reduced contact surface
- This is a bit more pressing of a concern (pun intended). If you note above, I mentioned ‘contact surface’. This is the area of the tire which is actually making contact with the road surface. When a tire is over-inflated, this contact surface is reduced as the pressure causes the tire to bulge more in the middle. This reduced contact surface can lead to increased risk of hydroplaning and understeer which are definitely not something you want to experience in your RV.
- Poor ride quality
- If the tire is overinflated, it will be less ‘spongy’. This means less road vibration is absorbed in the rubber and air cushion of the tire, and thus more vibration is transmitted into the suspension and ultimately, your RV. More noise, higher potential of broken dishes, extra strain on cabinet and TV mounts, etc.. all bad things for the longevity of your RV. Not to mention, your aching bones!
Of course, underinflation is even worse!
- Uneven tire wear
- With underinflation, the tire will be riding more on the sides of the tread and thus the sides will wear more quickly than the middle of the tire. Again, as stated above, RV’ers typically have to replace tires before the tread life has exhausted, but this is still worth mentioning.
- Spongy steering response
- With too little air in the tire, the rubber of the tire is not as well supported. This leads to the tire easily ‘squishing’ side to side as your RV barrels down the road.
This can exacerbate any rhythmic road issues like concrete joints, leading to reduced control of the coach and increased nerve wear on the driver and passengers! - Excess sidewall flex
- Ok, stay with me here.. this one is important! While the above items are not good, this is the real tire killer. As a tire rolls, the area in contact with the road is forced to flatten under the load. As that section rolls away from the road, it expands again. This constant flattening / expanding cycle causes flex in the edges of the tread and sidewall. Any time there’s flex in a mechanical sense, heat is generated. Tires are engineered to absorb and dissipate this heat when driven within their design tolerance. But underinflation creates much more sidewall flex as the air pressure is insufficient to sustain the tire’s vertical profile. This increased flex leads to increased heat, beyond that of the which the tire was designed for. Increased mechanical flex and increased heat cause the tire materials to break down more quickly and lead to premature tire failure.
So what is the right pressure? Clearly, over and under inflation both have their downsides. The answer is to follow the recommendations given by the tire manufacturer and depends on the exact tire you have ( brand, model, size ), the tire configuration ( dual tires vs single tire on each axle end ) and…
<drum roll>the weight being handled by that tire!</drum roll>
- Best
- Have your RV weighed at a rally or other gathering where the RV Safety and Education Foundation (RVSEF) will be performing per-tire position weighing. ( Schedule link ). Per-position weighing is the only way to truly know if you are exceeding one of the various weight ratings of your coach, suspension or tires.
- An OK second option
- Have your RV weighed per-axle at a truck-stop scale. This is a great first step for getting into the right ballpark of your RV’s inflation pressure. This does not account for side-to-side load variance in an RV, so you may wish to bump up to the next recommended pressure to help account for that until you can get per-position weights.
- A distant thrid, but better than nothing if you like math
- An interesting physics experiment I encountered in high school can be of some use here, but only for the math oriented or otherwise scale adverse (or challenged). You’ll need some paint, cardboard, a pen or sharpie, a ruler or other measuring device, a tire pressure gauge (you have that already right?) and patience. The gest goes like this:
- Cut the cardboard so that you have enough to fit fully under each tire, plus some extra border. You’ll want one for each tire, and an extra one to account for each different tire type/size, etc.. that your RV has installed
- Position 1 piece of cardboard in front of each tire type variation such that the tire will roll onto it when you pull forward (or backward)
- Apply wet paint a section of the tire tread which is getting ready to roll onto the cardboard such that the entire area which is on the cardboard is painted
- Roll forward so the painted area is on the cardboard
- Roll backward and remove the cardboard
- Calculate the approximate (as close as possible) percentage of area that the tread took up on the cardboard in a given space. Example:
- Pick a 4″ by 4″ area
- Measure the area consumed by the tread inside that 4″ by 4″ area
- Divide the tread area by 16 square inches (the area inside a 4″ by 4″ area)
- This is your percentage to use in a bit
- Now, place a piece of cardboard in front of EVERY tire
- Measure the air pressure in EVERY tire and record it onto the cardboard for that specific tire
- Write down the calculated Tread percentage calculated above onto the cardboard for that specific type of tire.
- Roll forward (or backward) onto the cardboard such that EVERY tire is fully on the cardboard
- With your pen or sharpie, mark as closely as you can to the perimeter of the tire which is actually in contact with the cardboard
- Roll the RV off of the cardboard
- Calculate the area of your marked tire contact on the cardboard pieces and write that next to the tire pressure you measured, and the tread contact percentage
- Now, for the math: Multiply the tread contact percentage by the tire contact area by the measured pressure (all in inches, and PSI)
- TA DA! You now have approximate per-tire weights of your RV!
Yes, this method is tedious, and labor intensive.. and is only as accurate as you make it, but it’ll get you in a general ballpark for your load per tire.
No matter which method you used above, now you need to find the inflation pressure recommended by the tire manufacturer for your combination of parameters. The RVSEF has a great listing of tire pressure inflation tables ( link ).
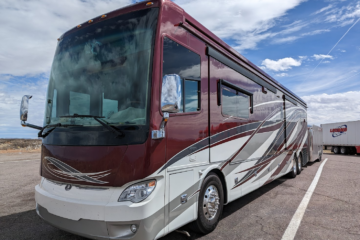
Here’s an example for our coach:
- We’ve not been to a rally with RVSEF present, so we decided to use a truck scale.
- Our RV has a tag axle
- Since we tow a car hauler trailer, I did two weighings to get all axles individual weights ( except for the dual axle on the car hauler — I presume similar weights on both )
Weighing:
- First weighing, we were pulled forward with the tag and drive axles on the “Drive Axle” weigh plate, and the car hauler on the “Trailer Axle” weigh plate.
- Steer Axle: 15880 lb
- Drive Axle: 27040 lb
- Trailer Axle: 7980 lb
- Gross Weight: 50900 lb
- Second weighing, we were back a bit, with only the coach’s drive axle on the “Drive Axle” weigh plate, and the coach’s tag axle and car hauler on the “Trailer Axle” weigh plate.
- Steer Axle: 15880 lb
- Drive Axle: 17780 lb
- Trailer Axle: 17240 lb
- Gross Weight: 50900 lb
- Some quick math:
Drive Axle 1st weigh (27040)
– Drive Axle 2nd weigh (17780)
Tag Axle Weight: 9230 lb
Our Tires:
Michelin XZA2 Energy (link)
- Steer axle: 315/80 R22.5 @ 15880 lb / 2 = 7940 lb per axle end, single tire: 120 psi
- The load chart shows 7920 lb and 8270 lb, since my tires are nominally at 7940, I bumped up to the next higher pressure recommendation
- Drive Axle: 295/80 R22.5 @ 17780 lb / 2 = 8890 lb per axle end, dual tire: 75 psi
- You read that right, only 75 PSI on my drive axle tires! The first load rating for dual tire is 9530 lb. That’s higher than my actual load on that axle end, so I use that lowest recommended pressure.
- Tag Axle: 295/80 R22.5 @ 9230 lb / 2 = 4615 lb per axle end, single tire: 75 psi
- Again, 75 psi may look low, but the first load rating for single tire is 5375 lb, and my actual load is well below that. Thus, I use the lowest recommended pressure for my Tag axle tires.
A few tips / notes
- All recommended pressures are ‘COLD’ pressure
- This means, the pressure of your tire, first thing in the morning with no miles driven on the tire that day. Yes, the tire heats up, and the pressure increases throughout the travel day, but the tire is engineered to handle this heat up / pressure increase. As long as you start at the right pressure in the morning, you’re good to go.
- For Tag axle coaches, don’t dump your tag when weighing
- This can be a bit tricky. In our 2016 Tiffin Allegro Bus, the Tag axle dumps automatically if you put on the turn signal below 20mph, or if you shift into reverse. I had to weigh twice on my second measurement because I realized after the first weigh (of my 2nd measurement), that I had put on my turn signal (not a bad habit mind you) when I was turning into the truck stop. So, my tag axle air bags had dumped and much more weight had shifted to the drive axle! (5720 lb more to be precise) Be sure you’re familiar with the operation of your Tag axle dump system to know you’re getting the right loaded weights.
- Weigh with a travel ready RV
- Do you normally travel with full fresh water? Significant other in the passenger seat? Kids buckled into the couch? 2 Dogs, a Cat and a ferret? If so, make sure all of those are in place before you weigh. Sure, a cat or ferret won’t change your weight much, but a big dog might! May as well be thorough!

Mark · 2017-06-22 at 13:51
Excellent.
Comments are closed.